
5 tips for using Luminosity Masks in Nature Photography
Nov 03, 2021When I reflect on the biggest growth within my photography there are definitive milestones, things that had more impact than others like capturing in RAW format, photographing in manual mode, understanding how to work with the light, and how I seemed to have pulled it all together and finally understood the value and role that Luminosity Masks played in my image processing.
The first thing is to understand what luminosity masks are. Transitionary layers in Photoshop that impact only particular pixels in an image. The four main types you can create are:
- Luminosity (brightness)
- Color range
- Color tone
- Saturation
What this means is we can build a mask that targets specific bright or dark tones, colors, tones, or saturation. When we target specific things in our images we can make subtle adjustments to just those particular things. Rather than attacking our images with a jackhammer we are able to approach it with a scalpel.
The next big principle to understand what the mask does. It took me a while to figure it out, but it helps to remember a term like this.
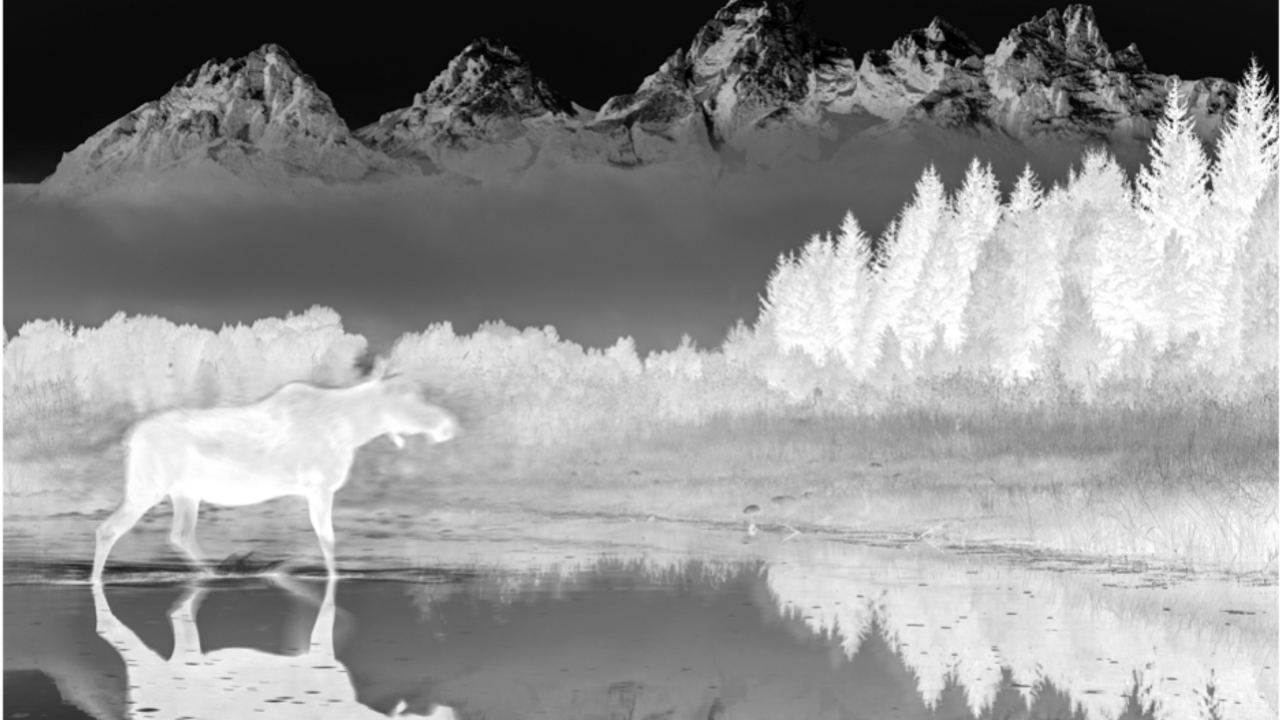
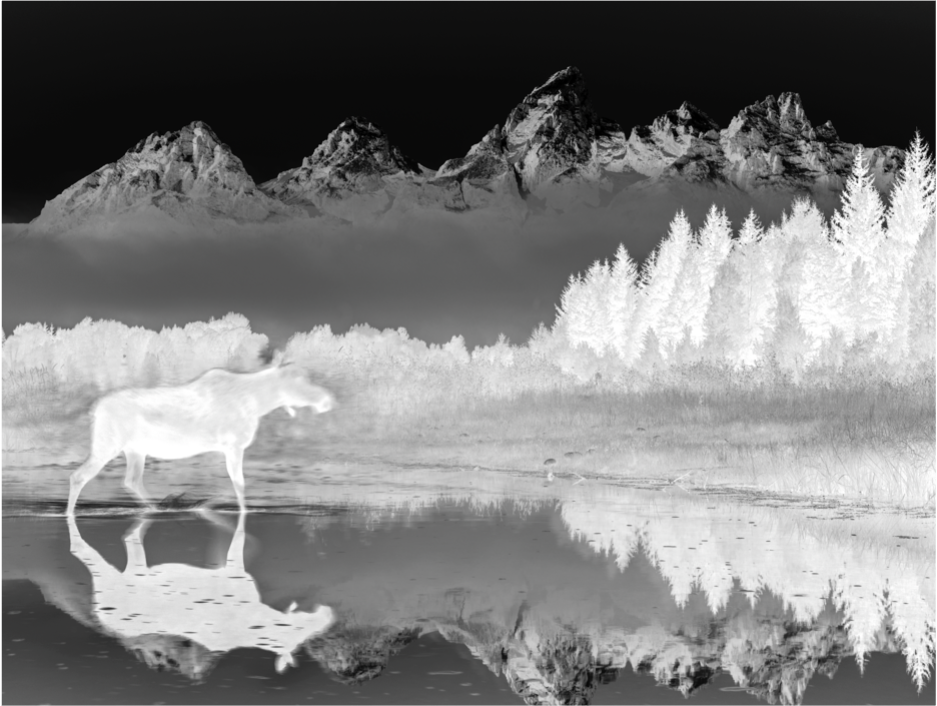
White reveals – Black conceals
White provides – Black hides
White is ON – Black is GONE
What this means is if you take the image above, that which is in white is going to be adjusted and that which is black will not be adjusted. This goes such a long way to help you with gradual transitions in your images.
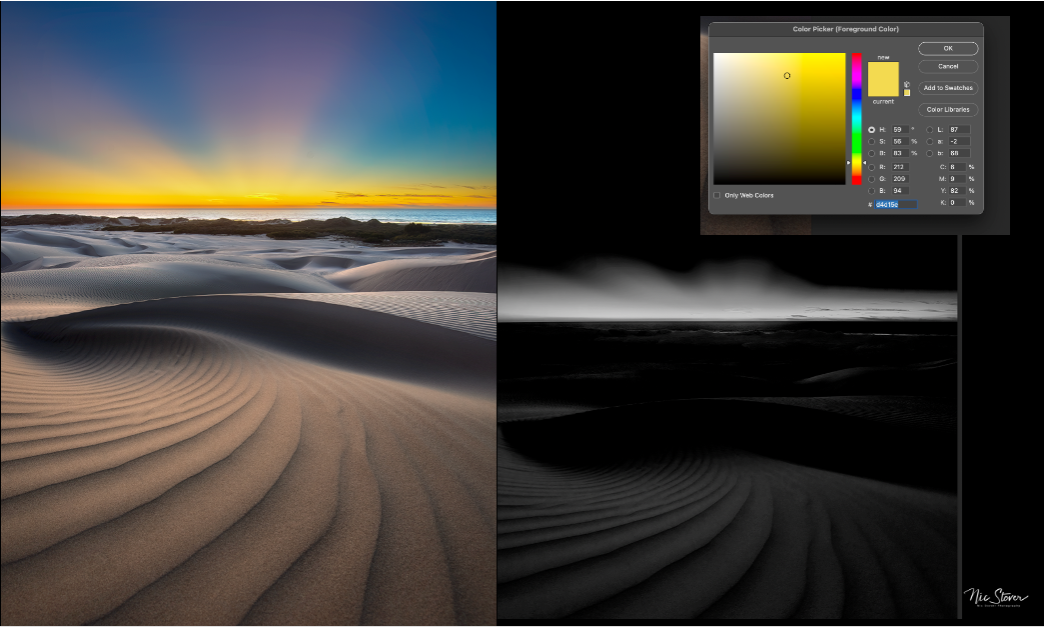
The third way to think about using Luminosity Masks is to think about what you really need to do with your images. What needs to be fixed / improved, or downplayed. Then think about what characteristics are represented by that item. A bright sky that needs to be subdued would be a brights mask, a dark area of your image that needs to be brightened up would be a darks mask. Have an area that needs more saturation then you would target that specific color in the color picker and then you would only be targeting that portion like in this image below.
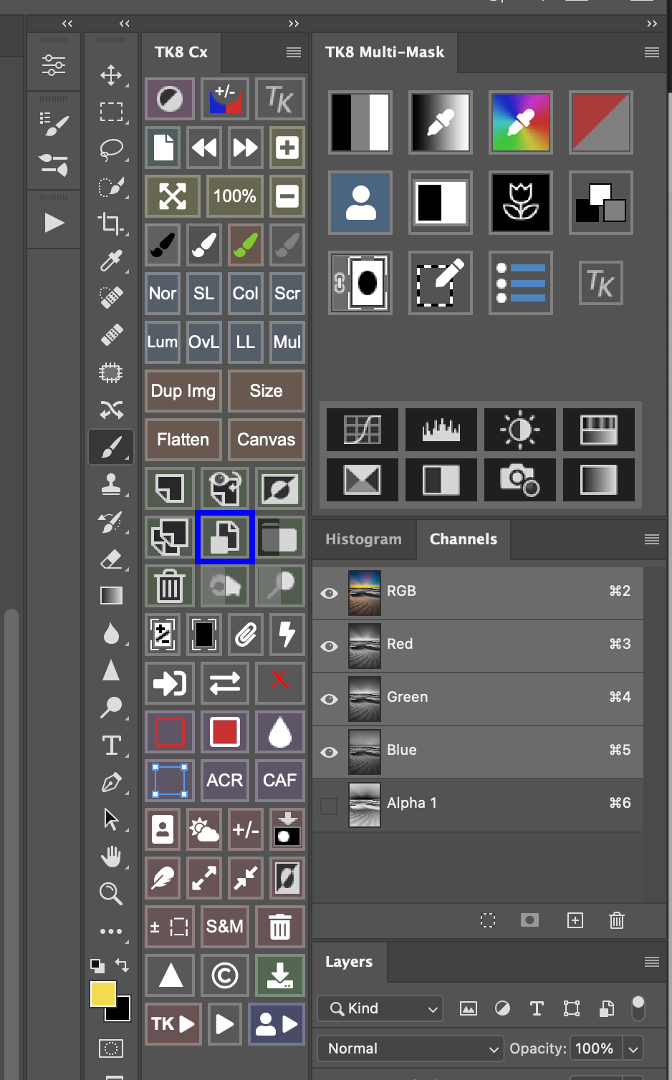
A fourth way to think about the power of Luminosity Masking is using the programs that come with them to improve your workflow and speed up your post processing. The three major Luminosity Mask options are TK Masks from Tony Kuyper https://goodlight.us/, RayaPro from Jimmy McIntyre https://www.shutterevolve.com , and Lumenzia from Greg Benz https://gregbenzphotography.com/lumenzia. All three have pros and cons and some people prefer one over another. I personally use the TK masking more than the others as they have loads of other shortcuts and tools I can use beyond just the masks that speed up my workflow. Below is a screenshot of how the plugins look in Photoshop and you can see I have so many options to choose from vs hunting around in the menu bars for the things I need.
The final tip I will share. No one understands Luminosity Masking right away. It took me years, but then it just clicked. The reason? I focused on just one specific thing vs trying to learn it all. I started using them just to Dodge and Burn. And then from there I started to expand, and learn, expand, and learn. So pick one thing you'd like to learn and start there.
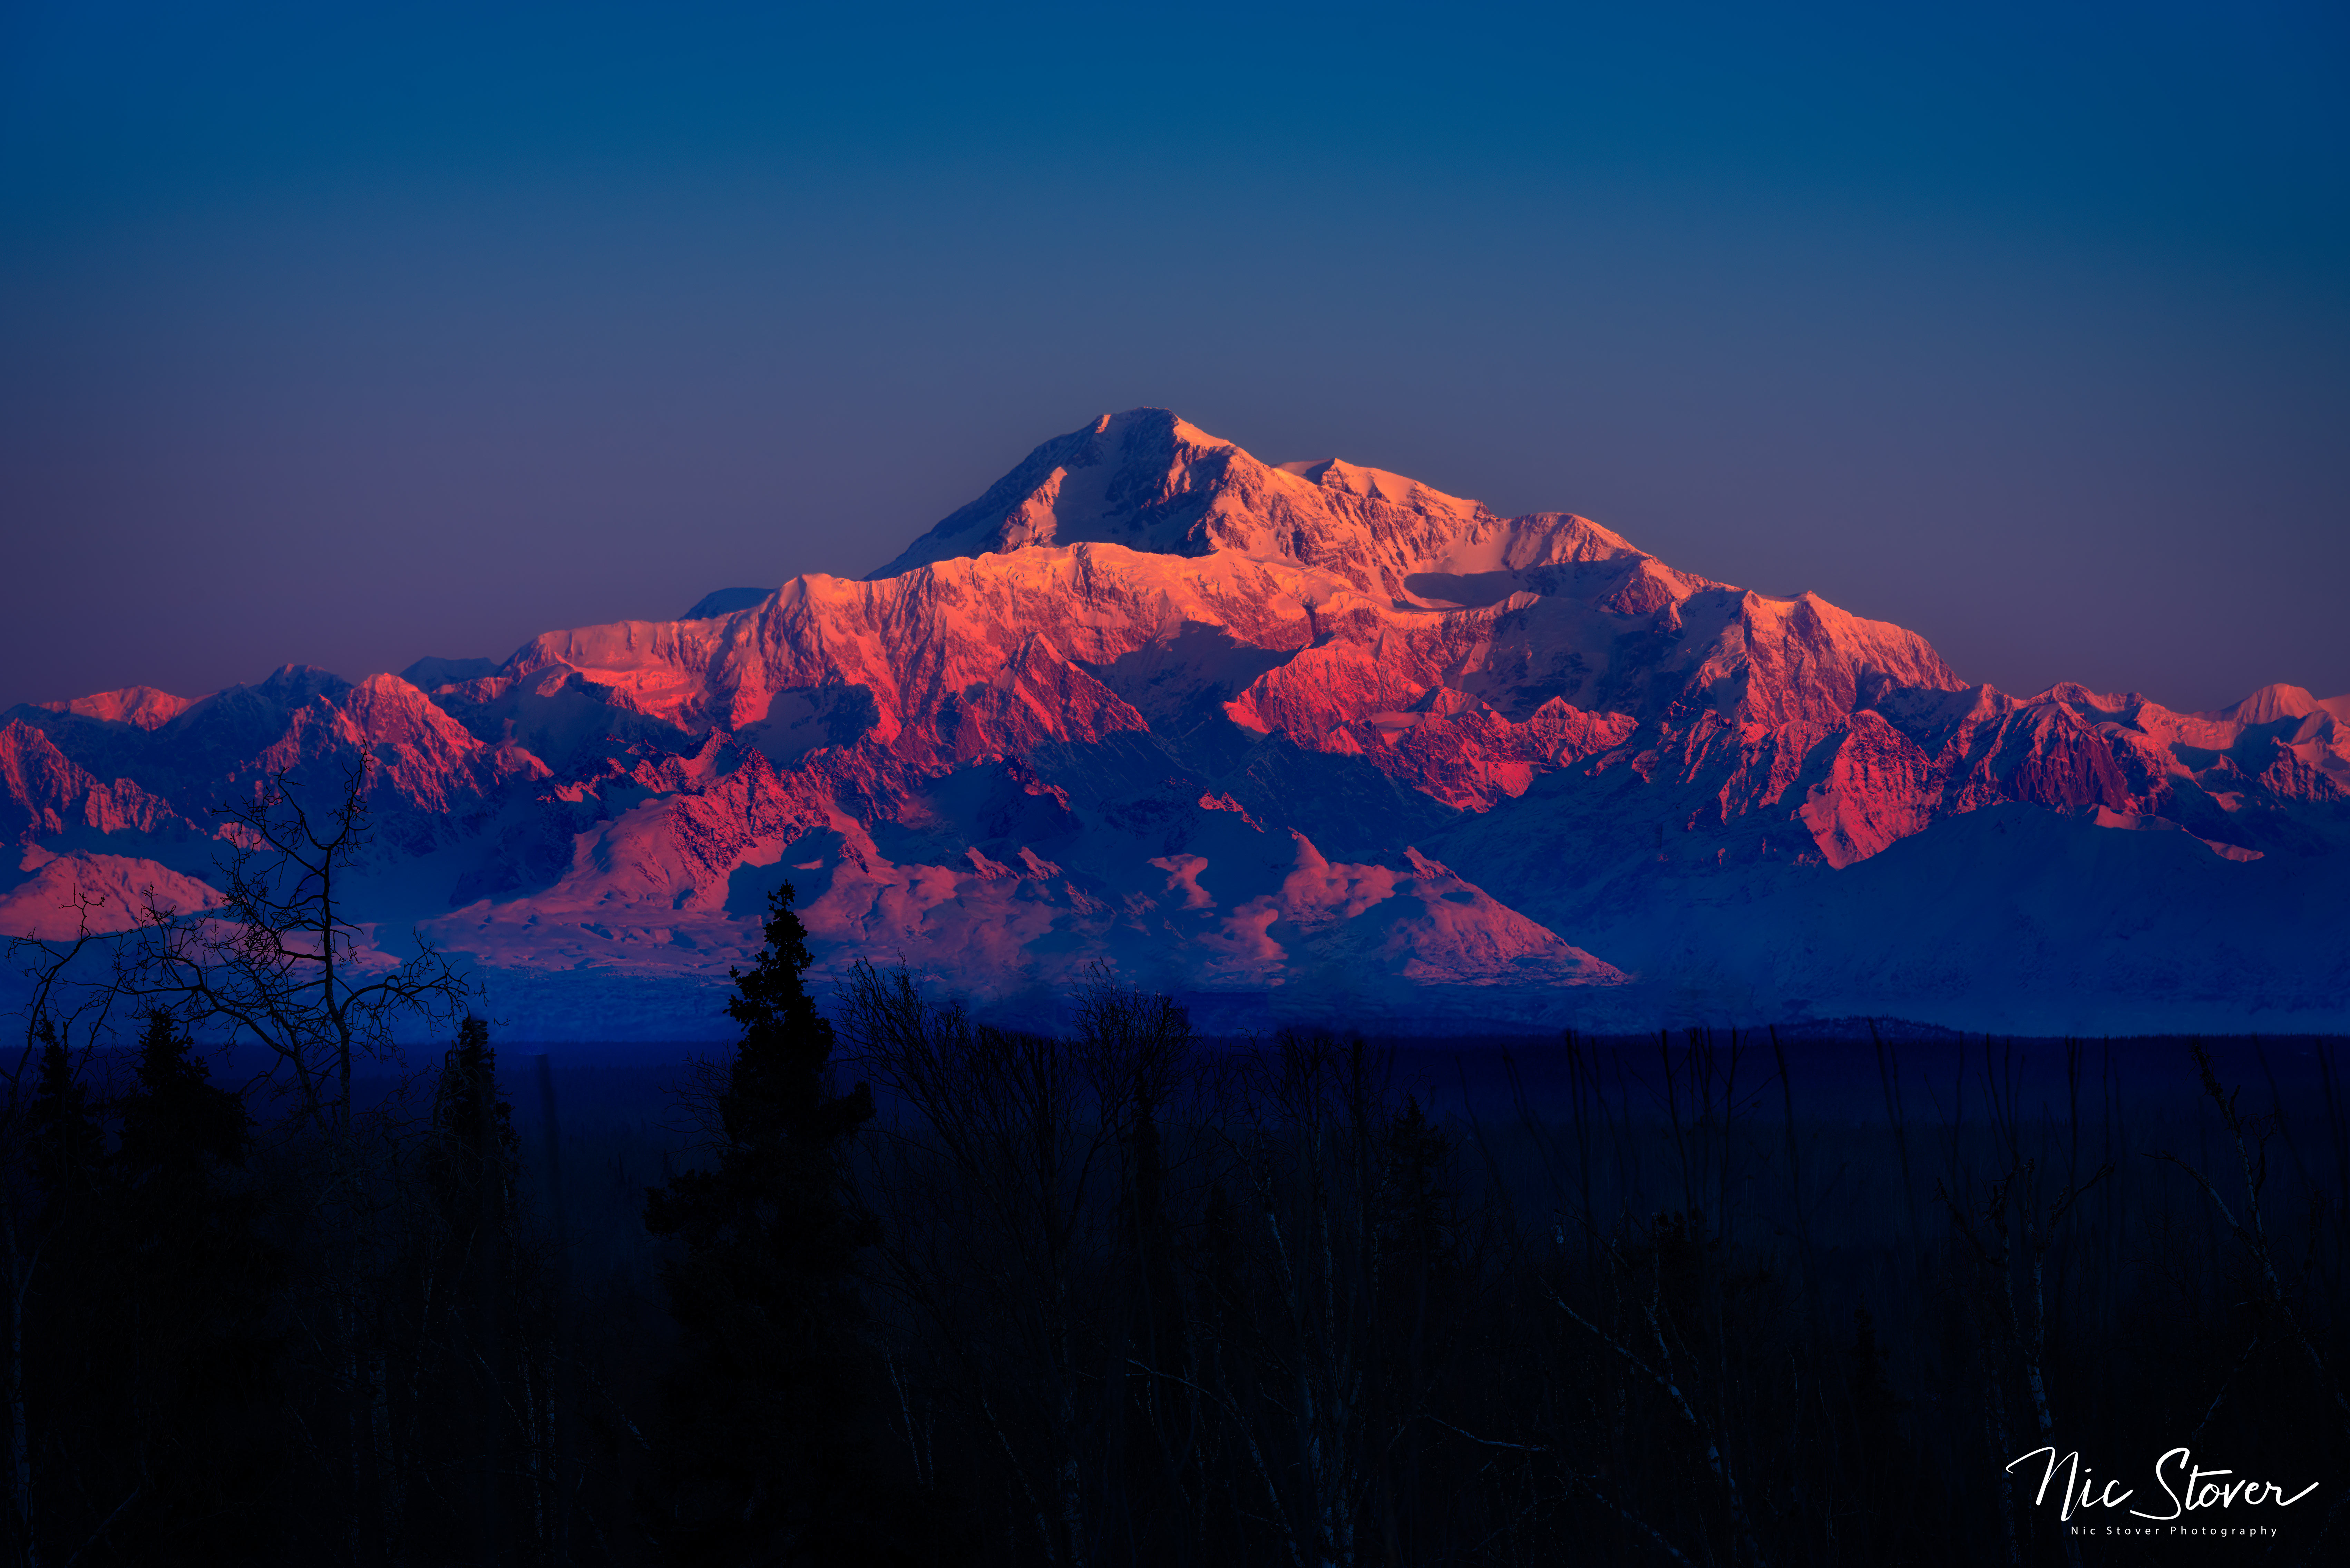
Here is an image from Denali where I used TK8 to get the right balance of light and dark in my image.
If you enjoyed this post, please check out my https://www.naturephotographyclasses.com/photography-post-processing-course
Stay Connected with News and Updates!
Join my mailing list to receive the latest news and updates from me. Choose the topic you are most interested in and I'll focus on sending you personalized content. Don't worry, your information will not be shared.
We hate SPAM. We will never sell your information, for any reason.

Author

I love writing almost as much as I love photography and hope that the posts and articles that I share through my blog will help you develop your photography skills further. Enjoy the read and remember to sign up to receive monthly news of the topics that interest you most.
